
A funky baby kimono, all knitted in one piece (including sleeves and borders) with 2-colour stripes and the simplest fairisle possible! Two pairs of I-cord ties keep it in place without the need for buttons.
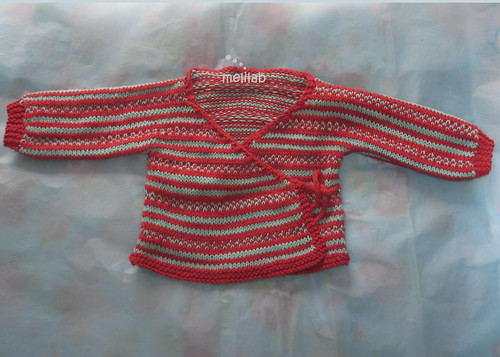
Inspired by my niece - or nephew - who is arriving within this month of june and for whom I wanted a not-too-fussy-but-interesting knit, with minimum sewing and suitable for a baby girl or boy through their first summer months.
Pattern
Please note that this is the first complete(ish) pattern I have written and I would love to hear from you with any suggestions or errors you may find.
Size
3-6 months (supposed to be a loose fit but check the measurements of the intended recipient first)
Actual kimono size: chest 50cm, length 25cm (see schematic below)
Materials
Wendy Miami DK 50%cotton, 50% acrylic (discontinued)
2 x 50gr balls in red and 2 x 50gr balls in light turquoise
4mm straight needles
pair of 4mm DPNs (for I-cord)
darning needle
Tension: 22sts x 29 rows to 10cm

Stripe pattern (13 rows)
2 rows turquoise
2 rows red
2 rows turquoise
2 rows red
3 rows alternating red and turquoise each st
2 rows red
Please read ahead before starting for an overall view of the pattern and to make sure you are aware of shaping done in parallel.

Begin at the Back
Cast on 54 sts with red cotton.
Knit 4 rows garter st with red.
Join turquoise and continue in stockinette stitch repeating stripe pattern 3 times (or as required until the piece measures 15cm from cast-on edge).
From now on stitches are added for the sleeves, and the centre stitches are cast off when half the sleeve width is completed (top of shoulders) to form the back neck and proceed with the two front sides.
Cast on for Sleeves
Continue with first 2 rows of stripe pattern (turquoise) and then cast on 36 sts at the beginning of the next 2 (red) rows to form the sleeves. (36 + 54 +36 = 126 sts total)
Continue in stripe pattern apart from 5 sts at each end that are knitted in red garter stitch to form the cuffs. The cuffs are also made narrower by using short rows on every solid turquoise row by knitting until 5 sts from the edge and turning.
Continue in stripe pattern until the front sleeve width matches the back (10 + 10 cm) and then cast off 36 sts on each side (whilst on a red stripe). In my case that was at the 3rd row of the 3rd stripe pattern repeat from the top of the shoulders. Be aware that halfway through the sleeves you will be casting off the centre stitches for back neck as described below.
Shape back of Neck
At the same time, when the piece measures 25 cm from cast on edge - i.e. you have reached the top of the shoulders (at the 2nd row of the 6th pattern repeat in mine) - knit the centre 24 sts in garter stitch with red for 3 rows keeping to the stripe pattern for the rest. In the next row cast off the (thanks lila!) 18 centre sts (back of neck) thus splitting the piece and starting on the two front sides (knit these separately or in parallel, whatever is easier for you – I prefer knitting the two sides in parallel).
Front only from now on
Right front
Continue in stripe pattern except for 3 sts at the neck edge that are knitted in red and garter stitch (to form the vertical trim). After 8 rows start increasing 1 st at the neck edge (1 stitch in from the edge) of each row always keeping the 3 sts at the neck edge in red garter sts for the vertical trim.
Continue with the increases at the neck edge until you have 48 sts (you have already cast off the 36 sleeve stitches on each side 13 rows before) and then knit straight until the front matches the back, ending with 4 rows of garter stitch in red (25 cm).
Left front
Join in yarns as required and continue the same way as right side by reversing shaping.
Ties
Using DPNs, pick up 3 sts for I-cord where the increases end and the straight part begins at the right front, the left front and both corresponding side seams – inside right and outside left (for crossing the right side in the front).
Make the two outside ties (attached at the right front edge and outside left seam) 20 cm long and the two inside ties (attached at the left front edge and inside right seam) 15 cm long.
Finishing
Weave in all ends and join the sides of the kimono from each sleeve cuff to the bottom hem in one sweep.
...and the obvious small print:
Design by
Please do not use or distribute this pattern for profit, it is only intended for personal use.
Enjoy!
10 comments:
Thanks for sharing your pattern. My friend is due to have a baby in four weeks - I am likely going to knit this!!
How much yarn did you use?
PS I found you on flickr!
Thanks you for a beautiful pattern. Love the colors .
Hola! Ok! Very good idea, I'm going to knit this one: it is so pretty. How could I resist? When I'm ready I send pictures to you. Thanks for the pattern... I have a lot of babies this year (friends, people at work, etc. etc). 2007 is a baby year :-)))
this looks great, thanks so much for sharing! saw it through ravelry & it's now in my queue :)
Question: Any suggestions on how to make it adult (or, alternately, large child) sized? I think it's adorable!!
Hi Nina and thank you :-)
I have actually already made a kimono top for myself based on the same construction principle - knitted in one piece, including sleeves - but that was made in fibonacci stripes resulting to so many ends to weave in that I haven't gotten around to finishing it yet...
However, I am definetely planning to publish a similar adult pattern at some point, so watch my ravelry @ http://www.ravelry.com/people/melilab if you are interested.
Oh, it's gorgeous - thank you!
Nora
This is really awesome! Thanks for sharing!
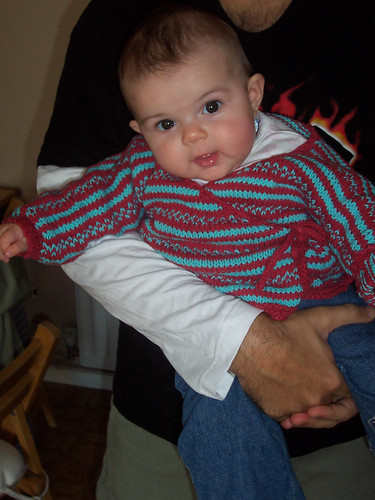
Thanks soooo much for sharing this GORGEOUS pattern. My daughter looks super sweet in it. Here's a link to my blog and which has a photo of her in it - www.caelanandsiahn.blogspot.com
It's such a cute pattern! I hope I can make at least one of this for my baby.
Thank you very much for sharing this!
Post a Comment